This is where you can learn everything there is to know about ‘The Novelist’. Please feel free to use the comment form to ask your questions or ask for help if I haven’t mentioned something.
The ‘File explorer’
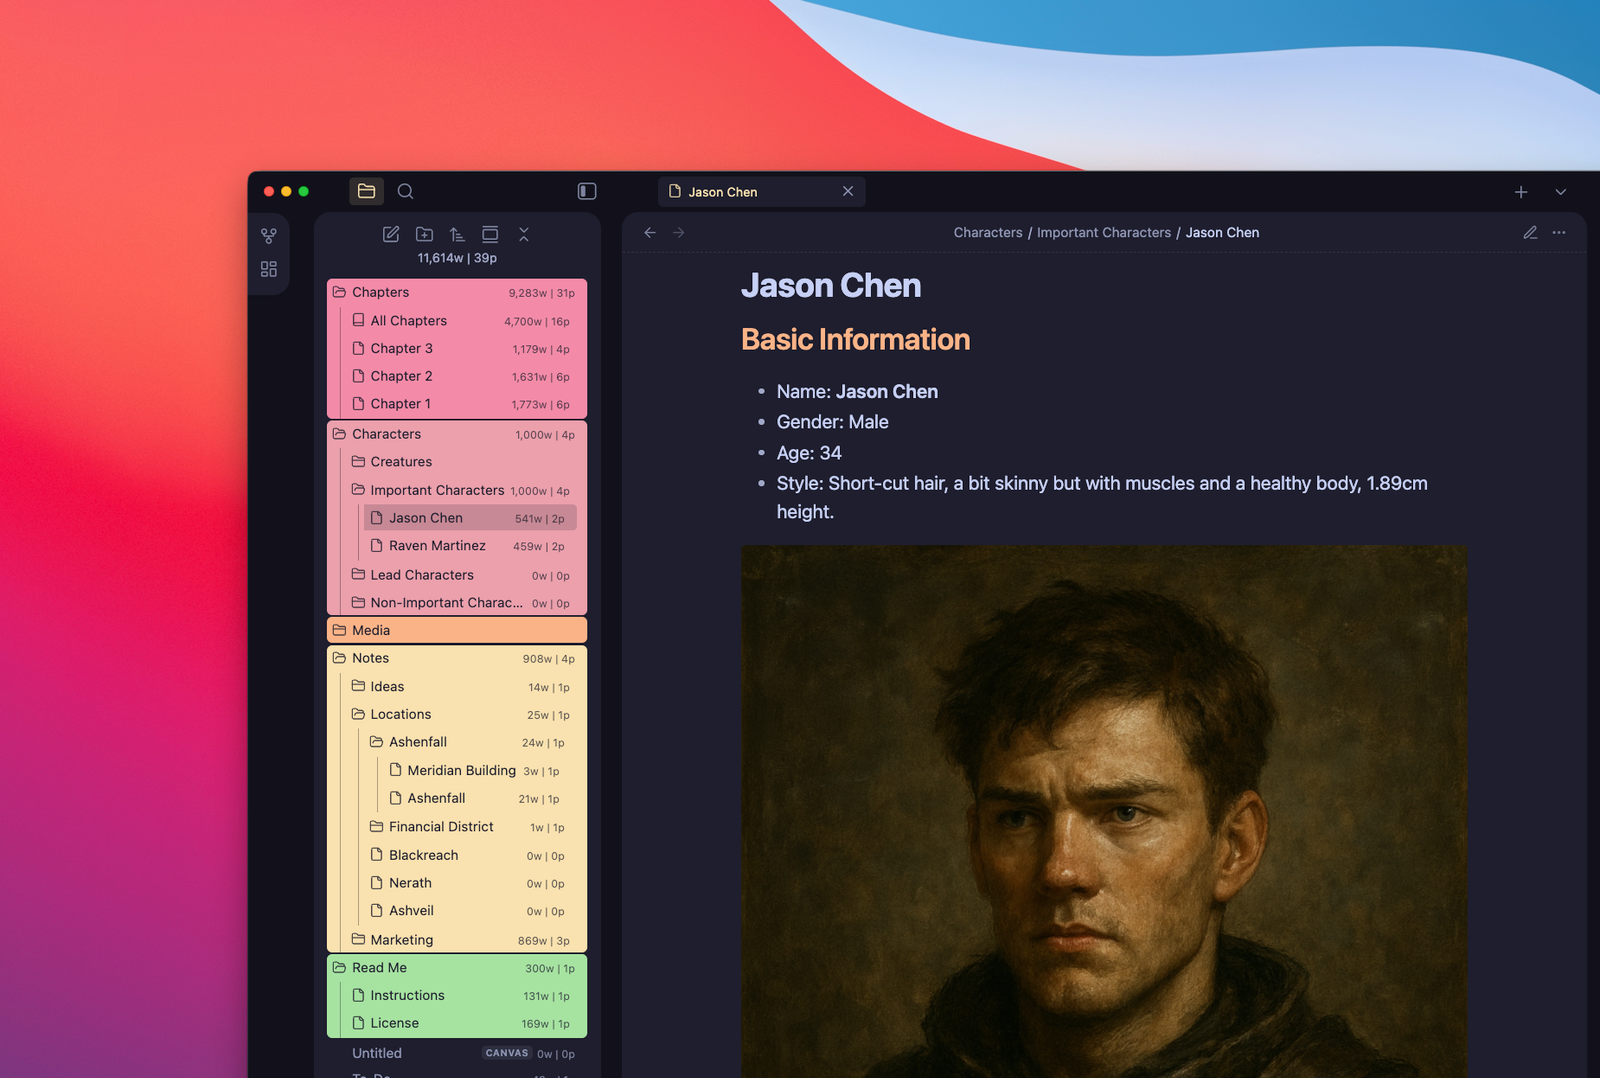
The ‘File Explorer’ is located on the left sidebar and shows all your folders, notes, media, and everything that you add to your vault. You can create, rename, delete, and organize all your files from this sidebar.
Here’s what ‘The Novelist’ includes:

Here’s how to work with the ‘File Explorer’:
How to create new notes and folders
Either click on the icons located at the top to create a new note or folder, or right-click and select “New note“, “New folder“, “New Canvas“, etc.
How to delete a folder or note
You can delete anything by right-clicking on it and selecting “Delete”.
How to organize your folders and files
You can drag and drop your notes into folders, and the same for folders if you want to add them as sub-folders.
If you take a few minutes to look at Obsidian’s default interface, it’s not that different from what ‘The Novelist’ offers, just with a few adjustments.
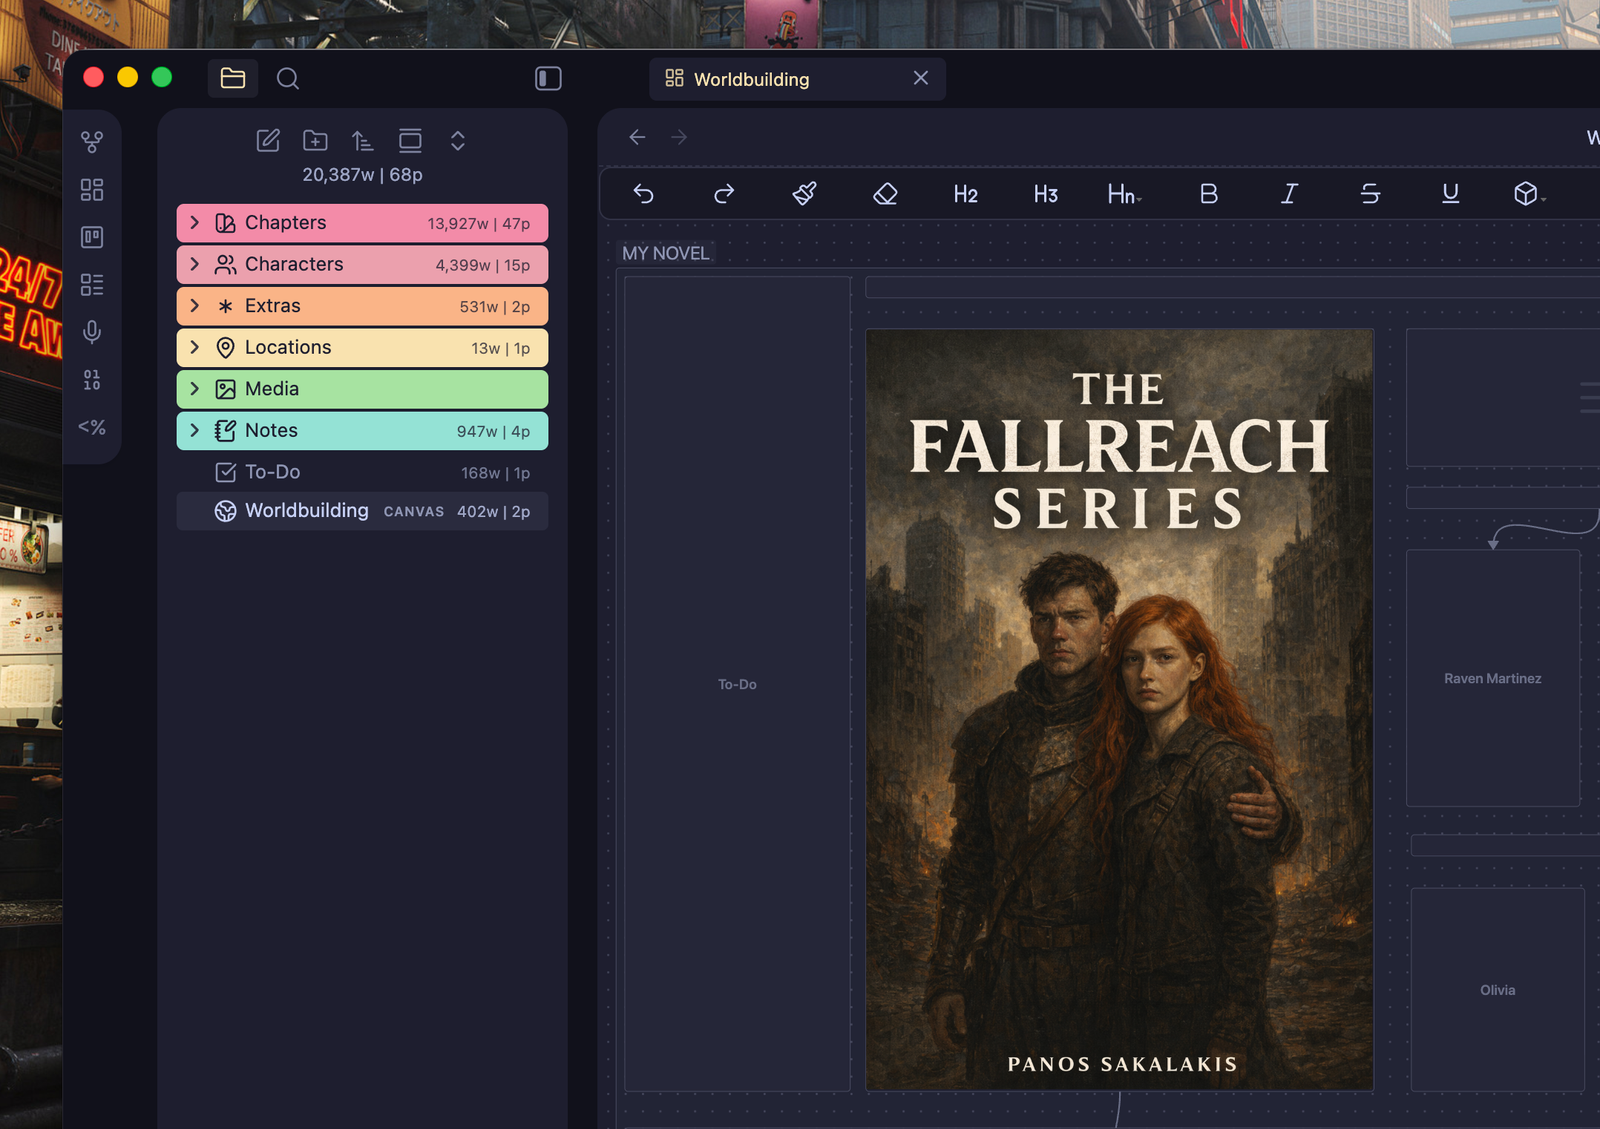
Worldbuilding with Canvas
Obsidian has a built-in plugin called “Canvas”. Once you enable it (it’s already enabled in ‘The Novelist’ by default), you can quickly create as many Canvas as you want. For this vault, I created one that works fairly well for novel-writing and worldbuilding, including everything I need and I want to quickly access.
To access the Worldbuilding Canvas, just click the “Worldbuilding” Canvas/Note that’s located at the bottom of the ‘File Explorer‘.
Those Canvas pages work with cards. Basically, you can add as many cards as you want by right-clicking on a blank spot and selecting “Add card“.
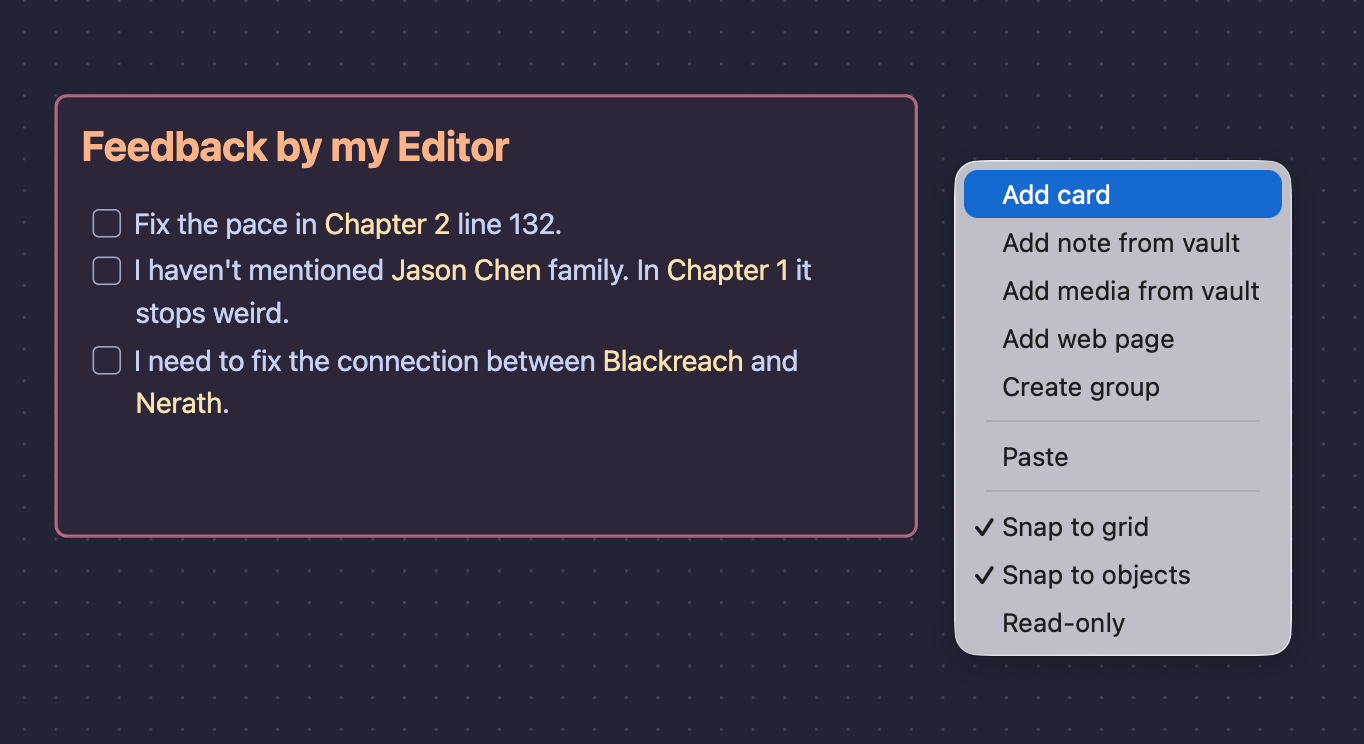
You can move any card by dragging it, change its color or size by selecting it and right-clicking on it, or even its color by clicking on it and selecting a color.
You can adjust everything by right-clicking or left-clicking either on a card or on a blank spot. For example, if you select a card, right-click on it, and select “Convert to file“, it will create a new note that you’d be able to access from the ‘File Explorer’.
You can also add that line that connects the cards together by hovering your cursor over a card and dragging any of the four dots that will be displayed at each side.
To-do lists, but Kanban Board style
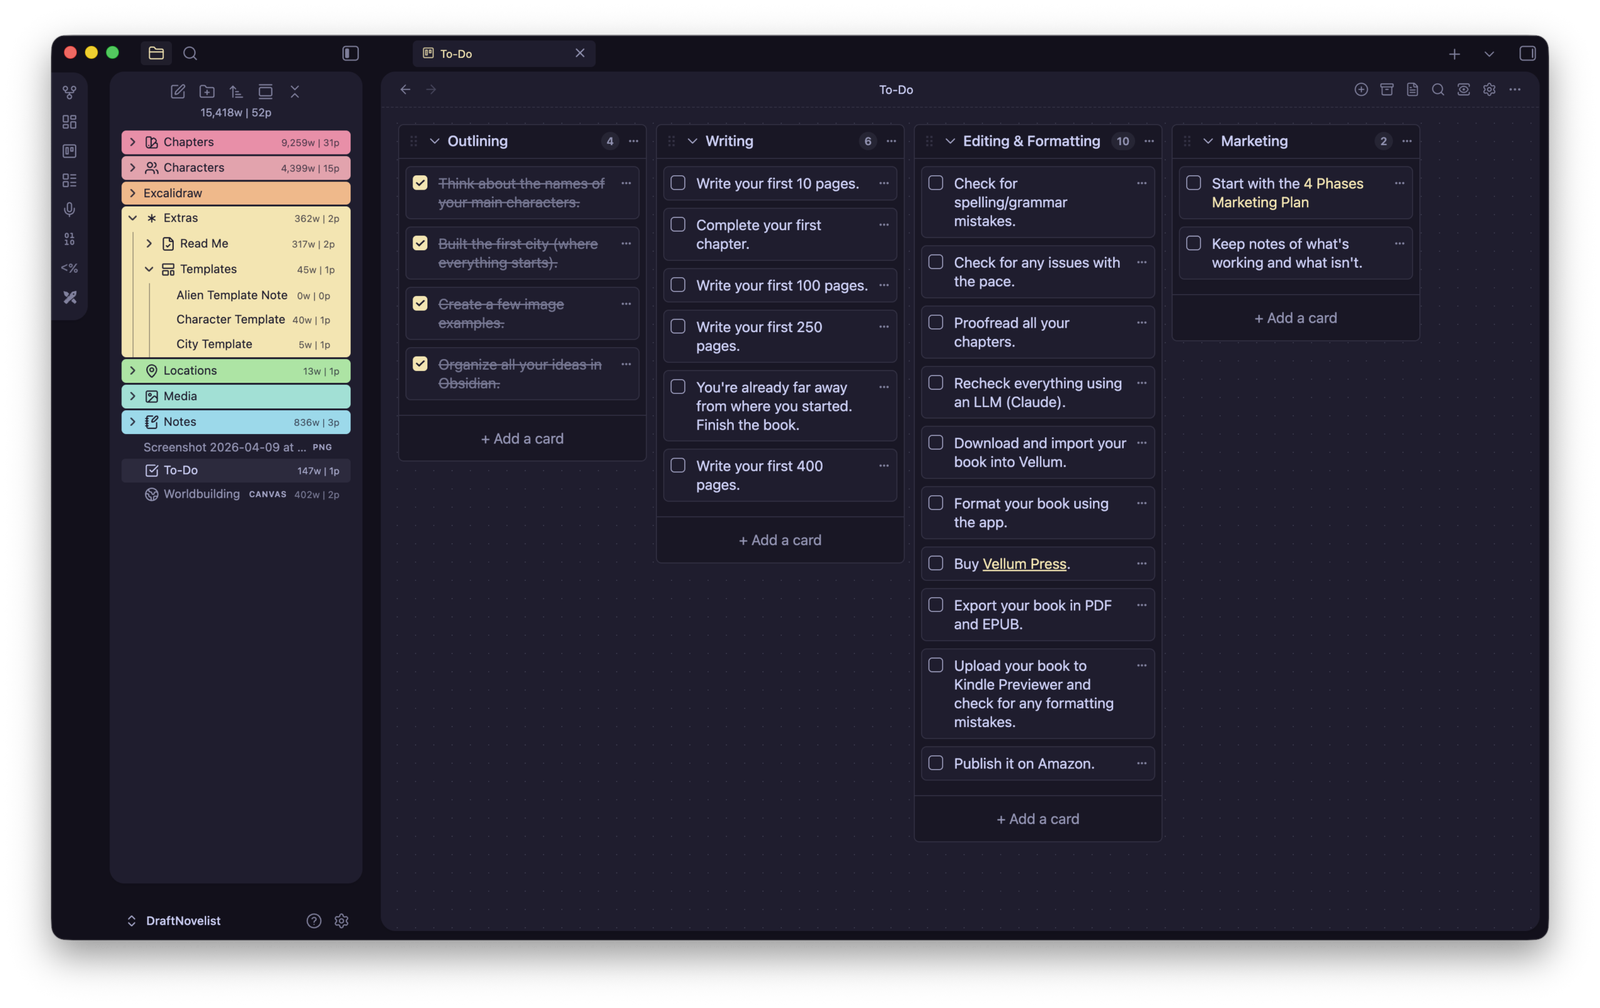
Sometimes, all I want to see is my progress and all the tasks I have to complete. Sometimes, I just want a simple place that’s not distracting me. The “To-Do” note is exactly that place, but unlike traditional notes, it’s built using the Kanban board style.
It’s not hard to use, as you can see from the image example above, just add and delete cards based on the boards that you created. Tick them as finished once done, move them around, and use Markdown format to format them.
Customizing the appearance
There are two ways that you can adjust the appearance of ‘The Novelist’ and everything that Obsidian offers: One from the default settings page, and one from a plugin that’s already installed and enabled for that exact purpose.
1st way: Obsidian Settings
To change Obsidian’s basic appearance settings:
- Click on the ‘Settings‘ icon.
- Go to the ‘Appearance‘ section from the options on the left.
- Switch between ‘Light’ and ‘Dark’ modes, change the theme or the default primary color, and more.
Those are the basic settings. To make more adjustments, head over to the second way.
2nd way: Style Settings
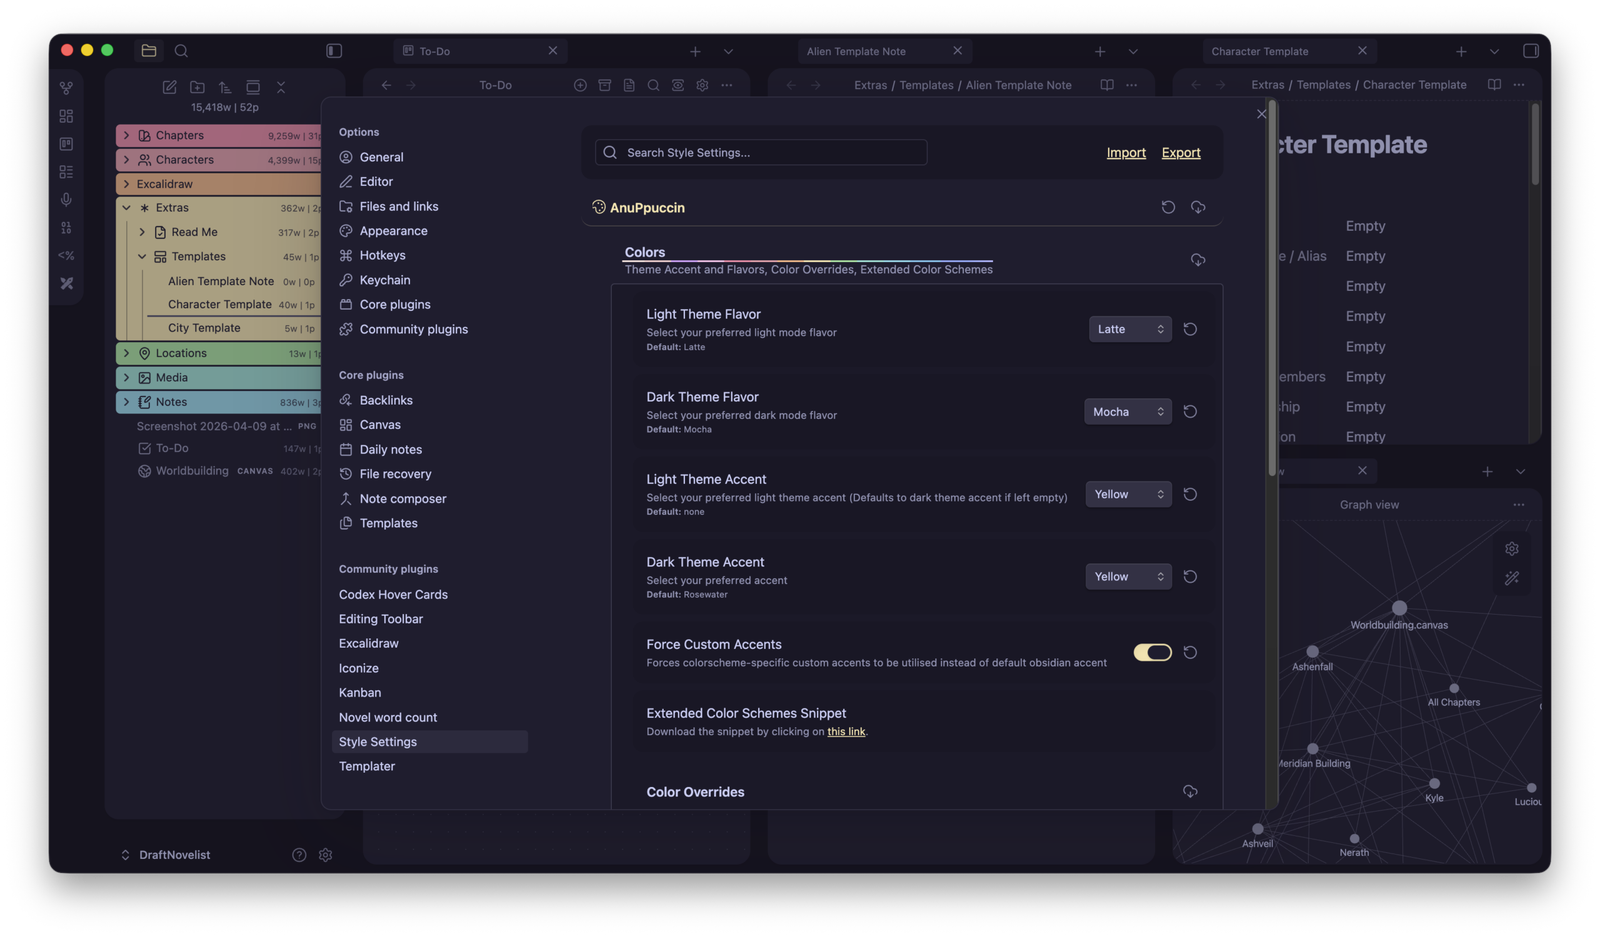
Currently, ‘The Novelist‘ uses the ‘AnuPpuccin‘ theme, which is beautiful, minimal, and colorful (with a few touches of my own). To change its colors and settings and adjust everything:
- Click on the ‘Settings‘ icon.
- Go to the “Style Settings” section.
- Click the AnuPpuccin option to open the options.
- Change the colors, fonts, file editor, elements, and so much more.
Take a minute to take a closer look at Obsidian’s Settings page. Everything is located on the left side, and all the options are on the right side. Check them all out to see what’s possible.
Working with multiple tabs open
One of the things that I love about Obsidian is that it lets you quickly split your tabs and have multiple ones active on the same interface. You can add a new tab to the left or right side, up or down from the current tab.
That means that I can continue writing the chapter I’m focusing on, and instead of changing windows or tabs or even switching between apps, I have another tab on the right side with the notes of that specific chapter. I do that for locations, specific events or dates, characters, etc.
To add a tab on either side, just right-click the note from the ‘File Explorer’ or from the browser-type tabs that are located at the top, and select “Open to the right“.
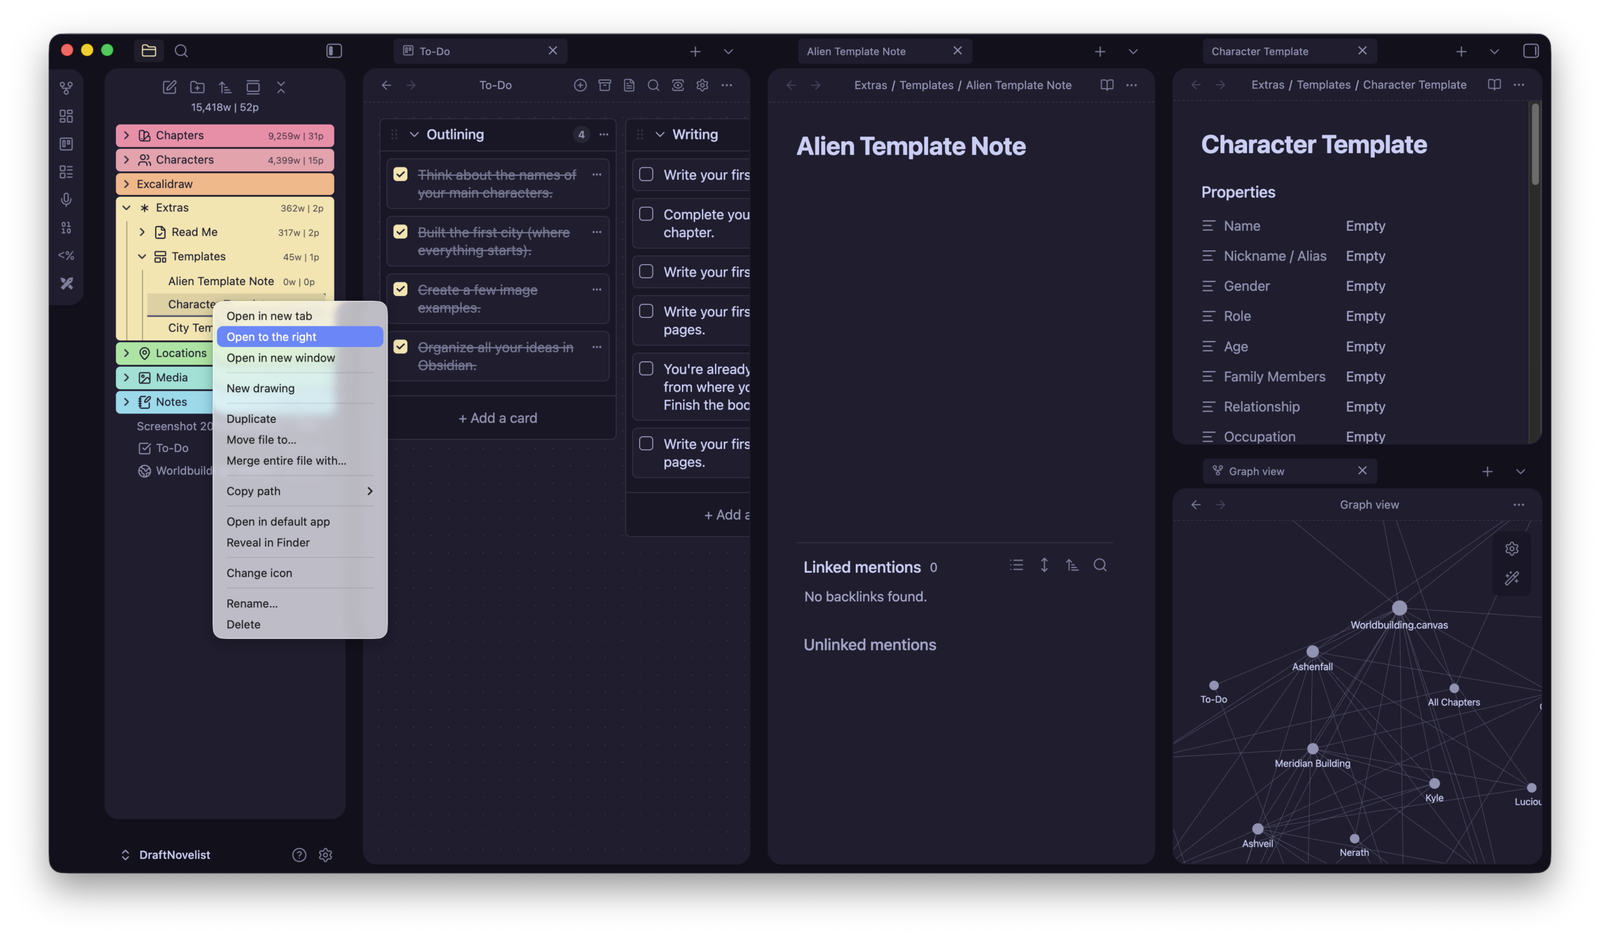
You can then right-click again and select “Split it down” if you want two tabs (one under the other) on that same column.
Setting up ‘Writing Goals’
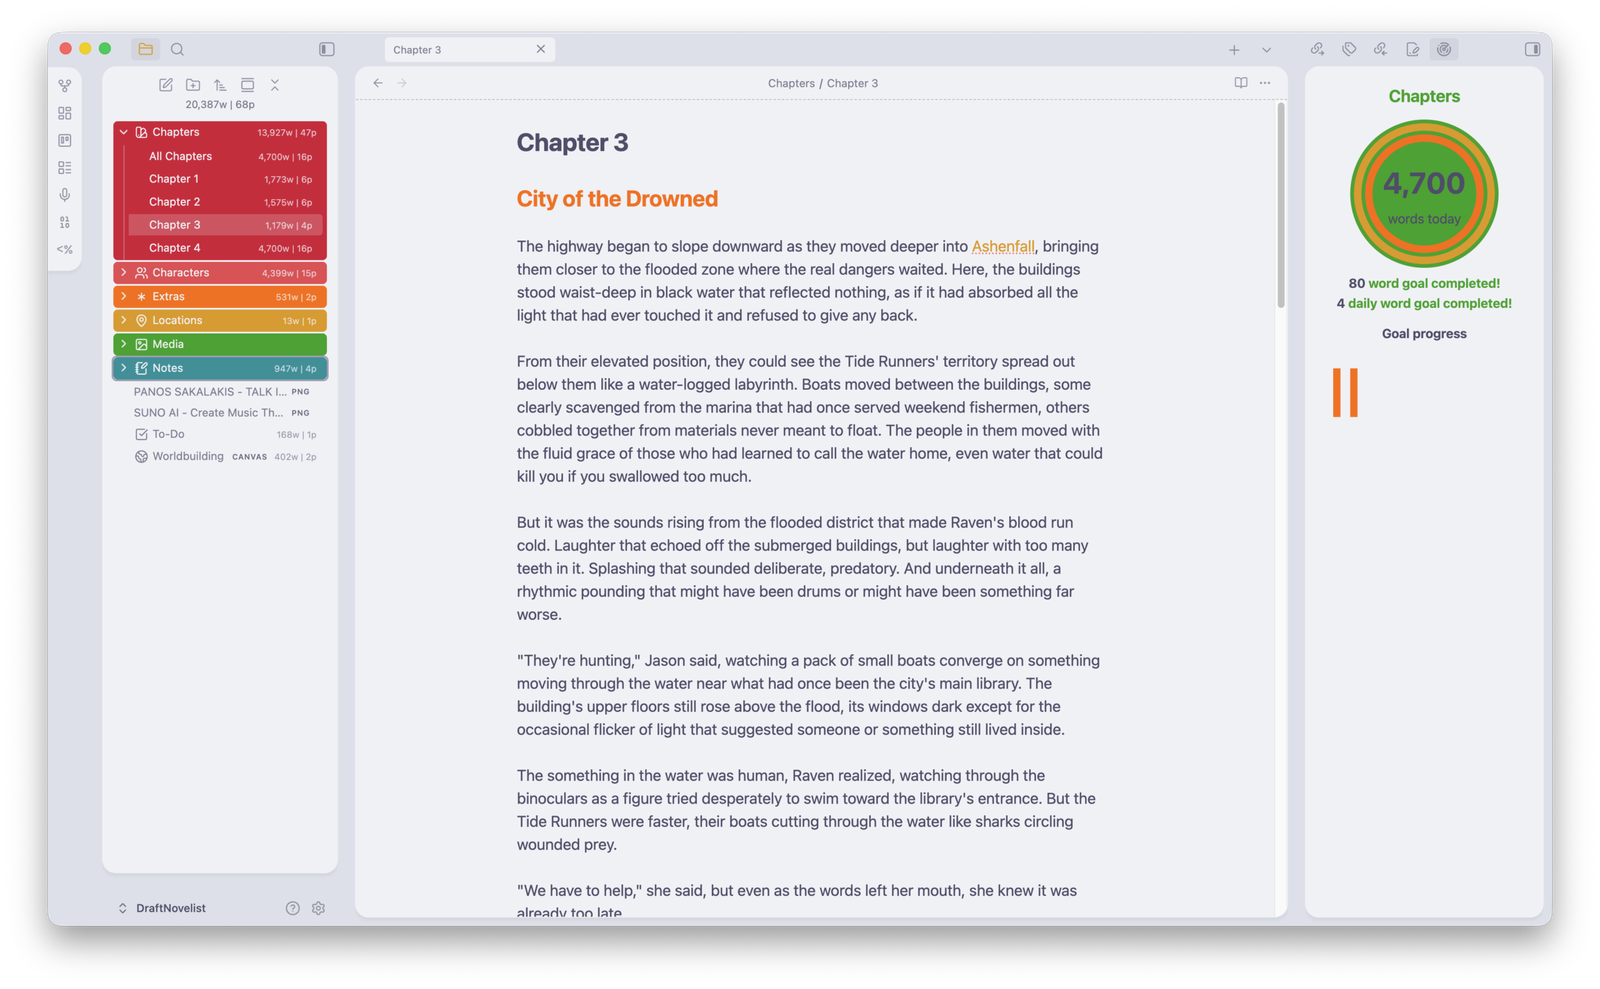
The Novelist includes writing goal tracking:
- Right-click on any folder or file in the Chapters section.
- Select “Add writing goal“.
- Set your daily word count target.
- Track your progress in the left panel.
- The system records your daily word count automatically.
You can disable this feature by going to Settings → Community Plugins → Tracking Goals and disabling the plugin. You can also completely remove it, and if you change your mind in the future, you can reinstall it again.
You can change the style of the ‘Writing Goals‘ plugin by going to Settings → Tracking Goals.
How to access the ‘Graph View’
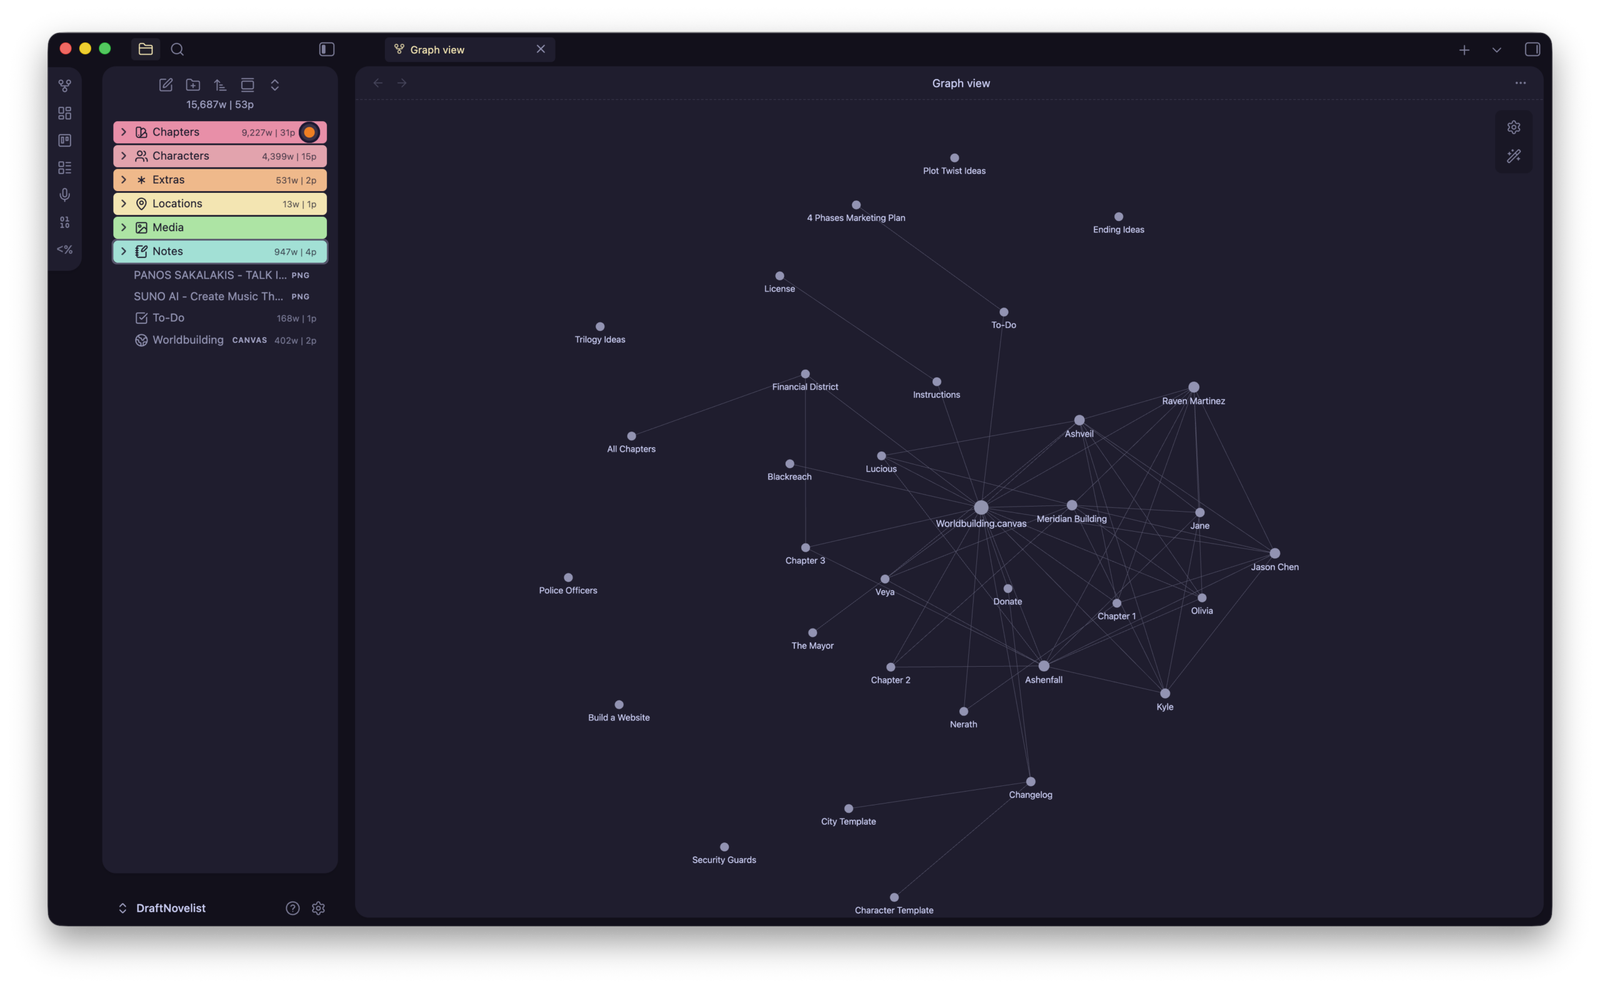
The ‘Graph View’ is a built-in feature that comes with Obsidian. While in the beginning it is not useful, once you have a lot of notes linked with each other, that’s when it can be useful to find lost connections that you may have missed in your story.
To open the ‘Graph View’, just click on its icon on the left panel: